Hey there, tech enthusiasts! Ready to turn your home into a printing paradise? Installing a printer might sound tricky, but fear not – we’ve got your back. This step-by-step guide will have you printing like a pro in no time. Let’s dive in!
Steps to install a printer
1. Unbox the Magic:
Unwrap your shiny new printer. Find the power cable, USB cord, and any other accessories hiding in the box. It’s like opening a present – the start of something exciting!
2. Find a Sweet Spot:
Choose a cozy spot for your printer, close to your computer and a power source. Plug it in – a bit like giving your printer a home of its own.
3. Power Up:
Press the power button and let the magic begin. Your printer will come to life with a friendly hum. A bit like waking it up from a nap!
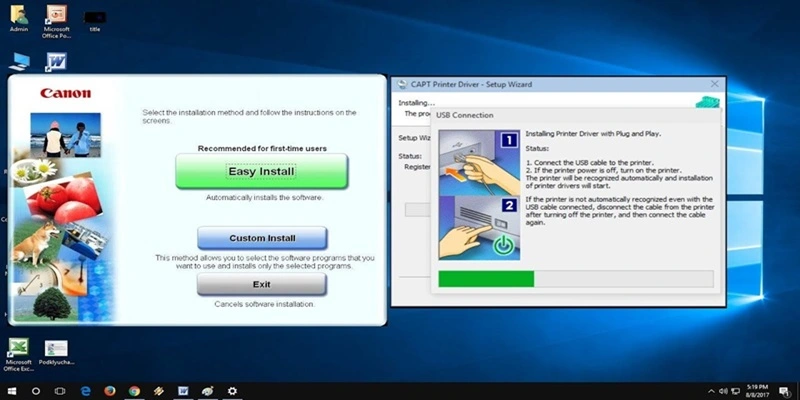
4. Connect the Dots – USB Style:
Grab the USB cord. One end goes into your printer, and the other into your computer. It’s like connecting the dots, but with cords.
5. Meet the Software – A Quick Date:
Your computer might need to get to know your printer. Insert the installation CD that came with it or download the software online. Follow the on-screen instructions – it’s like setting up a new friendship!
6. Test the Waters:
Print a test page to make sure everything’s hunky-dory. It’s like a trial run for your new printing BFF.
7. Wireless Wonders:
If your printer is feeling fancy and wireless, connect it to your Wi-Fi. Follow the instructions in the manual – it’s like giving your printer wings!
Conclusion:
Ta-da! You did it – your printer is now ready to turn your digital dreams into paper realities. Installing a printer is simpler than you think, and with these easy steps, you’re on your way to becoming a printing pro. Happy printing!